type
Post
status
Published
date
Apr 29, 2023
slug
summary
GPT时代下,服务器无感计算如何破局?
tags
无感计算
运维
服务器
category
技术分享
icon
由GOOD Lab-GSG小组隆重出品
一、OpenWhisk简介
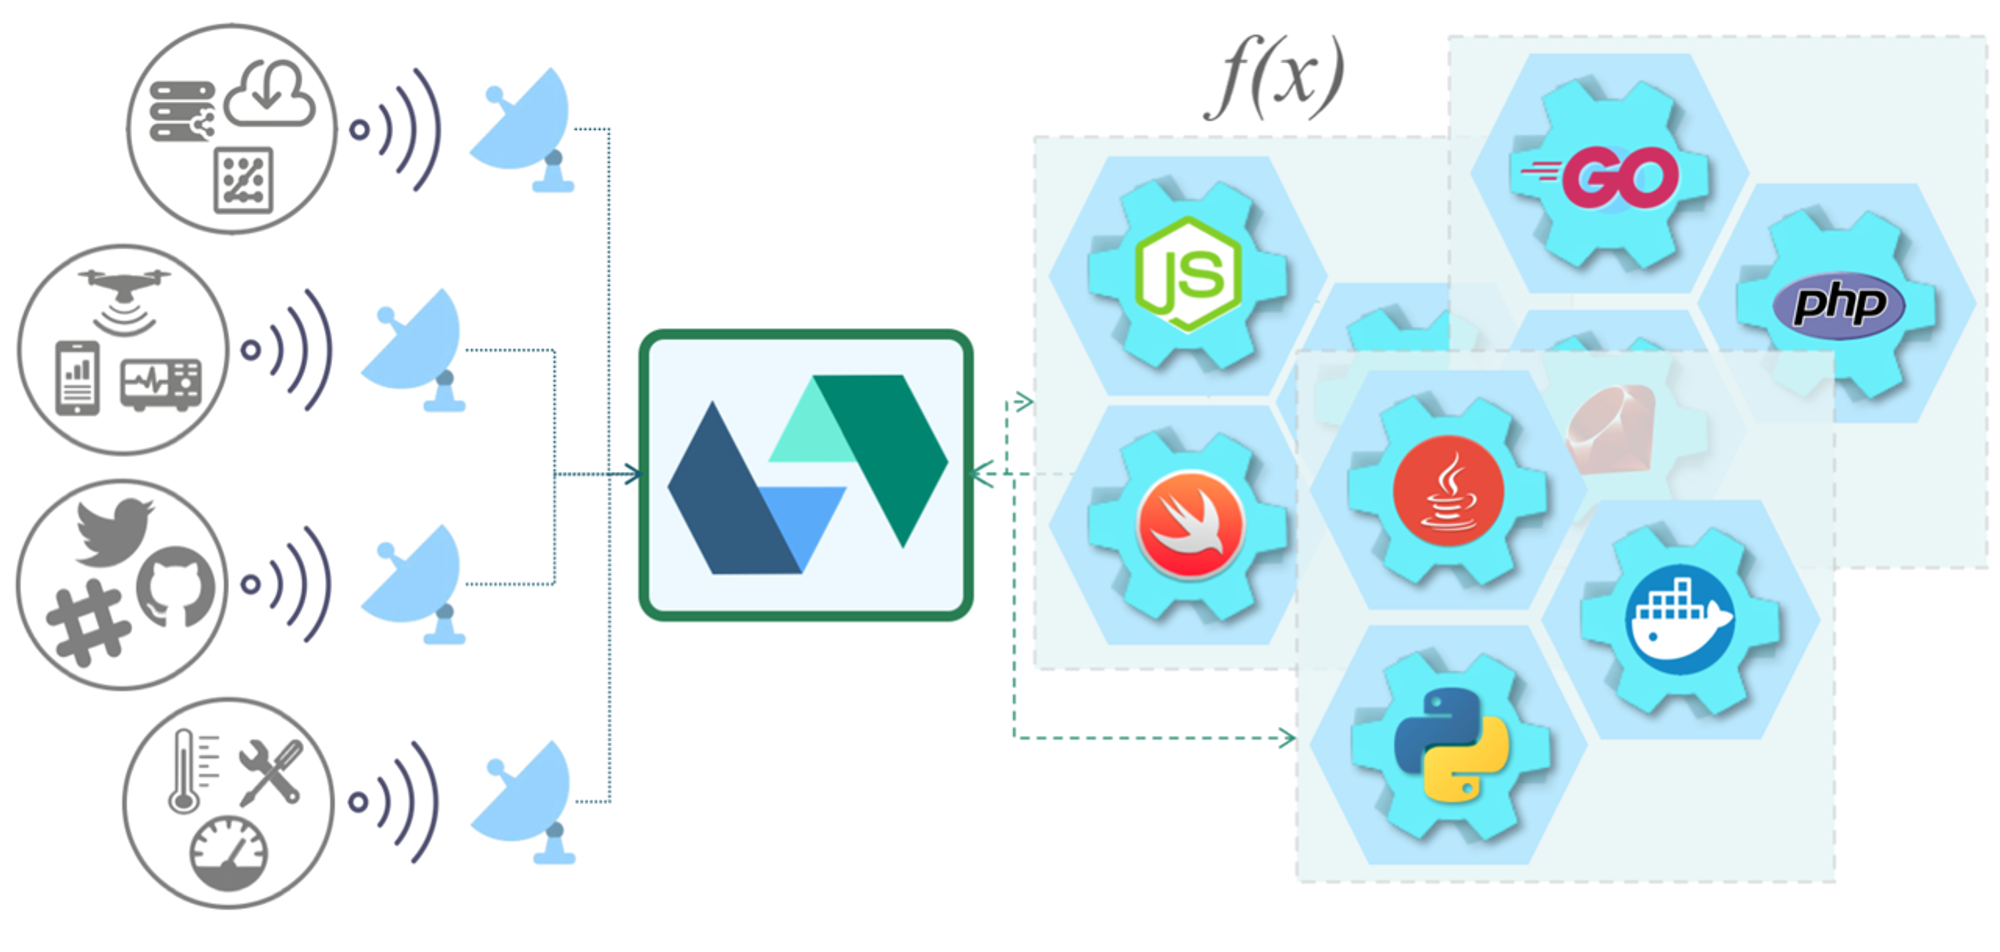
OpenWhisk是一种被学术界广泛使用的开源服务器无感计算框架,最初是是一个由IBM和Adobe驱动的开源项目,2016年被捐献给Apache基金会,并在2019年成为顶级项目。OpenWhisk在ServerlessBench()、FunctionBench()等基准测试研究中得到关注。Middleware’18中Nasirifard博士提出了OpenWhisk-bench(),针对无感计算函数无状态特性带来的可扩展性瓶颈设计了基准测试套件。OpenWhisk具备完整的服务器无感计算生态,严格遵循事件编程模型,下图展示了OpenWhisk基于事件驱动的核心编程模型。OpenWhisk事件可以来自任何事件源或 Feed 服务,包括数据存储、消息队列、Web应用程序、传感器、聊天机器人、计划任务(通过警报)等。当前工业界已经广泛应用OpenWhisk。
ServerlessBench
SJTU-IPADS • Updated May 2, 2023
serverless-faas-workbench
ddps-lab • Updated May 8, 2023
openwhisk-bench
i13tum • Updated Mar 27, 2023

Action
Action是OpenWhisk的核心,是在OpenWhisk框架上运行的无状态函数(代码片段),封装应用程序逻辑以响应事件执行。Action可以通过OpenWhisk REST API、OpenWhisk CLI、用户创建的 API 手动调用,或者通过我们稍后讨论的Trigger自动调用。一个Action对应着一个唯一的函数,无论运行时如何选择,用于创建、调用和管理Actions的OpenWhisk操作都是相同的。
使用组合Action序列,我们可以将多个任意语言运行时实现的Action组合在一起创建一个长处理管道(官方文档称为“序列”),序列可以使用wsk CLI的单个命令行进行创建和调用。
Action有event驱动、Web请求驱动两种类型,我们主要关注Web请求驱动的Action(https://github.com/apache/openwhisk/blob/master/docs/webactions.md#web-actions),这在一些商用无感计算框架(如华为云)中被称为HTTP函数。
Trigger and Rule
Trigger是从事件源发送的类或事件种类的通道。Rule用于将一个Trigger与一项Action相关联。对一对Trigger、Action创建Rule后,每次Trigger被触发都会调用Action。
为什么我需要将Action连接到事件源和Trigger? OpenWhisk基于事件驱动的架构,其中大多数操作在事件发生时执行。Trigger本身被来自事件源的键值对(即参数)字典“触发”,并允许配置可选的默认值,从而帮助确保数据与任何关联的操作兼容。规则允许同一个触发器与多个操作相关联,并允许在不破坏触发器定义的情况下动态启用或禁用特定的自动化。
在这里,我们只需要清楚,一个Action是可以通过Rule绑定多个Trigger的,也就是说一个Web Action可以被多个API调用。
wsk CLI
OpenWhisk提供了一个强大的命令行界面wsk(),允许对系统的各个方面进行全面管理。执行以下代码安装并测试wsk CLI.
openwhisk-cli
apache • Updated Apr 28, 2023
wget https://github.com/apache/openwhisk-cli/releases/download/1.2.0/OpenWhisk_CLI-1.2.0-linux-amd64.tgz
tar -zxvf OpenWhisk_CLI-1.2.0-linux-amd64.tgz
# 测试
./wsk
mv wsk /usr/local/bin
wsk
二、OpenWhisk软硬件环境配置
要在私有集群中部署一个OpenWhisk集群,我们需要对集群的软硬件环境做一些配置。对于硬件,建议至少配置3个节点,每个节点不低于4GB内存和2vCPU,配置网络能够正常访问github和docker hub。对于软件,经过测试和验证的软件环境如下:
- Ubuntu 20.04
- Kubernetes v1.22.4
- Helm v3.8.1
- NFS server
- Docker ce-23.0.3
接下来介绍软件环境配置步骤~
【1】配置基础环境
(1)禁用SElinux
SELinux代表Security Enhanced Linux,它是一种Linux内核中的访问控制系统,用于执行定义用户、程序和服务对系统的访问级别的资源策略。由于我们需要将linux系统的资源交给K8s托管,故我们首先需要在Ubuntu系统中禁用SElinux:
sudo apt install policycoreutils selinux-utils selinux-basics -y
sudo selinux-activate
sudo selinux-config-enforcing
# 检查selinux状态
sestatus
# 禁用selinux
vim /etc/selinux/config
# 修改这里
SELINUX=disabled
(2)关闭内存交换区Swap
内存交换区是使用磁盘作为虚拟内存的优化机制,但由于K8s需要将真实的内存分配给沙箱/容器,故需要将内存交换区关闭:
# 关闭内存缓存区
swapoff -a
vim /etc/fstab # 注释掉swap的一行
vim /etc/sysctl.conf # 增加 vm.swappiness=0
sysctl -p
(3)开启IPv4转发
IPv4转发是打通linux虚拟网段与物理网卡流量转发机制的关键配置,开启IPv4转发后内部沙箱/容器就可以联通外网:
vim /etc/sysctl.conf
net.ipv4.ip_forward=1
# 执行配置
sysctl -p
(4)安装K8s所需依赖
添加远程存储库证书和Ubuntu操作系统apt源,安装1.22.4版本K8s:
# 添加证书
curl https://mirrors.aliyun.com/kubernetes/apt/doc/apt-key.gpg | apt-key add -
# 添加apt源
vim /etc/apt/sources.list.d/kubernetes.list
deb https://mirrors.aliyun.com/kubernetes/apt/ kubernetes-xenial main

apt-get update

# 查看可安装版本
apt-cache madison kubelet

apt-get install -y kubelet=1.22.4-00 kubeadm=1.22.4-00 kubectl=1.22.4-00
systemctl enable kubelet
systemctl start kubelet
(5)安装Docker
这里使用Docker作为容器引擎,当然现在工业界前沿的应用已经有namespace隔离级别的PodMan,甚至于说直接使用containerd结合BuildKit配置容器。故这里使用Docker还是为了案例的简易,其他技术路线待师弟师妹探索。
# 设置仓库
sudo apt-get update
sudo apt-get install \
    apt-transport-https \
    ca-certificates \
    curl \
    gnupg-agent \
    software-properties-common -y
curl -fsSL https://mirrors.ustc.edu.cn/docker-ce/linux/ubuntu/gpg | sudo apt-key add -
sudo apt-key fingerprint 0EBFCD88
sudo add-apt-repository \
   "deb [arch=amd64] https://mirrors.ustc.edu.cn/docker-ce/linux/ubuntu/ \
  $(lsb_release -cs) \
  stable"
# 安装Docker-CE
sudo apt-get update -y
sudo apt-get install docker-ce docker-ce-cli containerd.io -y
systemctl enable docker
systemctl start docker
(6)Docker镜像加速器配置
使用阿里云账号提供的Docker镜像拉取加速服务,我们可以在Docker的核心进程配置项中设置阿里云镜像仓库,不必每次都访问Docker Hub,减少镜像拉取的时间开销。
cat <<EOF > daemon.json
{
  "exec-opts": ["native.cgroupdriver=systemd"],
  "registry-mirrors": ["https://ud6340vz.mirror.aliyuncs.com"]
}
EOF
mv daemon.json /etc/docker/
# 重新加载linux系统内核
systemctl daemon-reload
# 重启Docker服务
systemctl restart docker
(7)kubeadm初始化集群
注意这里需要设置阿里云的镜像仓库,并且service、pod的网段需要隔离开:
kubeadm init --apiserver-advertise-address=192.168.1.21 --image-repository registry.aliyuncs.com/google_containers --kubernetes-version v1.22.4 --service-cidr=10.96.0.0/12 --pod-network-cidr=10.244.0.0/16 --v=5
如何镜像拉取失败,可以先预拉取镜像:
# 查看对应版本所需镜像列表
kubeadm config images list --kubernetes-version=v1.22.4
# 预拉取镜像
docker pull registry.cn-hangzhou.aliyuncs.com/google_containers/kube-apiserver:v1.22.4
docker pull registry.cn-hangzhou.aliyuncs.com/google_containers/kube-controller-manager:v1.22.4
docker pull registry.cn-hangzhou.aliyuncs.com/google_containers/kube-scheduler:v1.22.4
docker pull registry.cn-hangzhou.aliyuncs.com/google_containers/kube-proxy:v1.22.4
docker pull registry.cn-hangzhou.aliyuncs.com/google_containers/pause:3.5
docker pull registry.cn-hangzhou.aliyuncs.com/google_containers/etcd:3.5.0-0
docker pull registry.cn-hangzhou.aliyuncs.com/google_containers/coredns:v1.8.4
(8)授权用户集群访问权限
# 复制授权文件,让当前用户使用kubectl可以访问到集群
mkdir -p $HOME/.kube
cp -i /etc/kubernetes/admin.conf $HOME/.kube/config
chown $(id -u):$(id -g) $HOME/.kube/config
(9)配置NFS(Network File System)
在我们接下来的OpenWhisk配置过程中,我们需要创建一些动态存储类或者静态pv卷,故需要对每个节点执行以下操作配置NFS服务:
apt install nfs-kernel-server -y
apt-get install nfs-common -y

vim /etc/exports
# 配置文件,直接设置*
/nfs *(rw,sync,no_root_squash)
exportfs -rv
exportfs

systemctl restart nfs-server
【2】OpenWhisk配置
在正式安装OpenWhisk之前,我们需要对OpenWhisk做一些系统配置,主要工作是对openwhisk-deploy-kube()提供的Helm Chart做一些参数配置,核心是helm/openwhisk路径下的runtime.json、value.yaml、以及自定义的mycluster.yaml三个配置文件。并且,为了支持OpenWhisk各个组件(Kafka、Redis、CouchDB)的数据持久化(可以理解为数据存储,这些组件是有状态的,但是他们的容器是无状态的,所以我们需要通过配置来弥补),我们需要结合我们之前的NFS服务配置K8s动态存储类,或者直接配置多个K8s静态pv卷。
openwhisk-deploy-kube
apache • Updated Apr 14, 2023
(1)K8s动态存储类/静态pv卷配置
K8s动态存储类和静态pv卷的yaml配置文件已经写好,存放在(https://github.com/QWQyyy/openwhisk-deploy-kube/tree/master/helm/openwhisk/ow-rsba)路径下。
只需要修改两个yaml中的`192.168.1.23`为自己的NFS服务器地址即可:
pv.yaml(静态pv卷)
apiVersion: v1
kind: PersistentVolume
metadata:
  name: openwhisk-nfs-01
spec:
  capacity:
    storage: 10Gi
  volumeMode: Filesystem
  accessModes:
    - ReadWriteOnce
  persistentVolumeReclaimPolicy: Recycle
  storageClassName: openwhisk-nfs
  nfs:
    server: 192.168.1.23
    path: "/nfs/openwhisk/01"
deployment.yaml(动态存储类核心配置)
kind: Deployment
apiVersion: apps/v1
metadata:
  name: nfs-client-provisioner
spec:
  replicas: 1
  strategy:
    type: Recreate
  selector:
    matchLabels:
      app: nfs-client-provisioner
  template:
    metadata:
      labels:
        app: nfs-client-provisioner
    spec:
      serviceAccountName: nfs-client-provisioner
      containers:
        - name: nfs-client-provisioner
          image: quay.io/external_storage/nfs-client-provisioner:latest
          volumeMounts:
            - name: nfs-client-root
              mountPath: /persistentvolumes
          env:
            - name: PROVISIONER_NAME
              value: example/nfs
            - name: NFS_SERVER
              value: 192.168.1.23
            - name: NFS_PATH
              value: /nfs/openwhisk
      volumes:
        - name: nfs-client-root
          nfs:
            server: 192.168.1.23
            path: /nfs/openwhisk
只需要执行:
./dep.sh
(2)自定义集群配置文件mycluster.yaml
mycluster.yaml是OpenWhisk K8s安装方式提供的集群自定义配置文件,用于覆盖Helm Chart中的原始配置,每个配置项都在Helm Chart的values.yaml中一一对应,配置mycluster.yaml就是在配置values.yaml。但是,我们对于一些参数一般不直接修改values.yaml。同时,由于官方编写的Helm Chart存在一些BUG,比如数字会被解析为科学计数法,导致OpenWhisk自动解析出来的配置项错误(已提交merge:https://github.com/QWQyyy/openwhisk-deploy-kube/commit/826dd1945d99a4c6f8b23af61092475ace486f26#diff-641b60f1ecad5beb5c039809fe03d8cf7a69edf20adb9ef848eba68d218fab8b)。
我们当前的配置中,mycluster.yaml内容如下:
whisk:
  runtimes: "runtimes1.json"
  ingress:
    type: NodePort
    # 本机IP
    apiHostName: 192.168.1.21
    # OpenWhisk网关所暴露的端口号
    apiHostPort: 31001
  limits:
    actions:
      time:
        # 函数最短执行时间
        min: "100ms"
        # 函数最长执行时间
        max: "5m"
        # 函数默认执行时间
        std: "1m"
      memory:
        # 可配置最小内存使用
        min: "128m"
        # 可配置最大内存使用
        max: "4096m"
        # 默认内存使用
        std: "256m"
      concurrency:
        min: 1
        max: 2000
        std: 50
      log:
        min: "0m"
        max: "10m"
        std: "10m"
    activation:
      payload:
        max: "1048576"
  # 负载均衡值
  loadbalancer:
    blackboxFraction: "100%"
  # 容器池大小
  containerPool:
    userMemory: "16384m"
nginx:
  # 对应OpenWhisk网关所暴露的端口号
  httpsNodePort: 31001
invoker:
  containerFactory:
    impl: "kubernetes"
k8s:
  persistence:
    # K8s提供的动态存储类名称
    explicitStorageClass: openwhisk-nfs
(3)自定义Helm核心配置values.yaml
values.yaml包含了OpenWhisk系统的完整配置参数,我们可以在这里设置每个组件的持久数据大小,以及系统限制(https://github.com/apache/openwhisk/blob/master/docs/reference.md#openwhisk-system-details)的相关参数。同时,我们还可以配置两个controller Pod,使OpenWhisk系统高可用。
# OpenWhisk系统配置
whisk:
  # Ingress defines how to access OpenWhisk from outside the Kubernetes cluster.
  # Only a subset of the values are actually used on any specific type of cluster.
  # See the "Configuring OpenWhisk section" of the docs/k8s-*.md that matches
  # your cluster type for details on what values to provide and how to get them.
  ingress:
    apiHostName: ""
    apiHostPort: 31001
    apiHostProto: "https"
    type: NodePort
    annotations:
      nginx.ingress.kubernetes.io/proxy-body-size: "50m"
    domain: "domain"
    awsSSL: "false"
    useInternally: false
    tls:
      enabled: true
      createsecret: true
      secretname: "ow-ingress-tls-secret"
      secrettype: "type"
      crt: "server.crt"
      key: "server.key"
  # Production deployments _MUST_ override these default auth values
  auth:
    system: "789c46b1-71f6-4ed5-8c54-816aa4f8c502:abczO3xZCLrMN6v2BKK1dXYFpXlPkccOFqm12CdAsMgRU4VrNZ9lyGVCGuMDGIwP"
    guest: "23bc46b1-71f6-4ed5-8c54-816aa4f8c502:123zO3xZCLrMN6v2BKK1dXYFpXlPkccOFqm12CdAsMgRU4VrNZ9lyGVCGuMDGIwP"
  systemNameSpace: "/whisk.system"


  ### 重点修改这里###
  limits:
    # 每分钟系统最大函数调用个数
    actionsInvokesPerminute: "50000000"
    # 函数最大并发个数
    actionsInvokesConcurrent: "50000000"
    # 每分钟触发器使用最大次数
    triggersFiresPerminute: "50000000"
    # 函数调用链最大长度
    actionsSequenceMaxlength: "50000000"
    actions:
      time:
        min: "100ms"
        max: "5m"
        std: "1m"
      memory:
        min: "128m"
        max: "512m"
        std: "256m"
      concurrency:
        min: 1
        max: 1
        std: 1
      log:
        min: "0m"
        max: "10m"
        std: "10m"
    activation:
      payload:
        max: "1048576"
  loadbalancer:
    blackboxFraction: "10%"
    timeoutFactor: 2
  # Kafka configuration. For all sub-fields a value of "" means use the default from application.conf
  kafka:
    replicationFactor: ""
    topics:
      prefix: ""
      cacheInvalidation:
        segmentBytes: ""
        retentionBytes: ""
        retentionMs: ""
      completed:
        segmentBytes: ""
        retentionBytes: ""
        retentionMs: ""
      events:
        segmentBytes: ""
        retentionBytes: ""
        retentionMs: ""
      health:
        segmentBytes: ""
        retentionBytes: ""
        retentionMs: ""
      invoker:
        segmentBytes: ""
        retentionBytes: ""
        retentionMs: ""
      scheduler:
        segmentBytes: ""
        retentionBytes: ""
        retentionMs: ""
      creationAck:
        segmentBytes: ""
        retentionBytes: ""
        retentionMs: ""
  containerPool:
    userMemory: "16384m"
  runtimes: "runtimes.json"
  durationChecker:
    timeWindow: "1 d"
  testing:
    includeTests: true
    includeSystemTests: false
  versions:
    openwhisk:
      buildDate: "2022-10-14-13:44:50Z"
      buildNo: "20221014"
      gitTag: "ef725a653ab112391f79c274d8e3dcfb915d59a3"
    openwhiskCli:
      tag: "1.1.0"
    openwhiskCatalog:
      gitTag: "1.0.0"
    openwhiskPackageAlarms:
      gitTag: "2.3.0"
    openwhiskPackageKafka:
      gitTag: "2.1.0"

k8s:
  domain: cluster.local
  dns: kube-dns.kube-system
  persistence:
    enabled: true
    hasDefaultStorageClass: true
    explicitStorageClass: null

# Images used to run auxillary tasks/jobs
utility:
  imageName: "openwhisk/ow-utils"
  imageTag: "ef725a6"
  imagePullPolicy: "IfNotPresent"

# Docker registry
docker:
  registry:
    name: ""
    username: ""
    password: ""
  timezone: "UTC"

# zookeeper configurations
zookeeper:
  external: false
  imageName: "zookeeper"
  imageTag: "3.4"
  imagePullPolicy: "IfNotPresent"
  # Note: Zookeeper's quorum protocol is designed to have an odd number of replicas.
  replicaCount: 1
  restartPolicy: "Always"
  connect_string: null
  host: null
  port: 2181
  serverPort: 2888
  leaderElectionPort: 3888
  persistence:
    size: 256Mi
  # Default values for entries in zoo.cfg (see Apache Zookeeper documentation for semantics)
  config:
    tickTime: 2000
    initLimit: 5
    syncLimit: 2
    dataDir: "/data"
    dataLogDir: "/datalog"

# kafka configurations
kafka:
  external: false
  imageName: "wurstmeister/kafka"
  imageTag: "2.12-2.3.1"
  imagePullPolicy: "IfNotPresent"
  replicaCount: 1
  restartPolicy: "Always"
  connect_string: null
  port: 9092
  # 调整一个较大值
  persistence:
    size: 2Gi

# Database configuration
db:
  external: false
  # Should we run a Job to wipe and re-initialize the database when the chart is deployed?
  # This should always be true if external is false.
  wipeAndInit: true
  imageName: "apache/couchdb"
  imageTag: "2.3"
  imagePullPolicy: "IfNotPresent"
  # NOTE: must be 1 (because initdb.sh enables single node mode)
  replicaCount: 1
  restartPolicy: "Always"
  host: null
  port: 5984
  provider: "CouchDB"
  protocol: "http"
  # Production deployments _MUST_ override the default user/password values
  auth:
    username: "whisk_admin"
    password: "some_passw0rd"
  dbPrefix: "test_"
  activationsTable: "test_activations"
  actionsTable: "test_whisks"
  authsTable: "test_subjects"
  # 调整一个较大值
  persistence:
    size: 2Gi

# CouchDB, ElasticSearch
activationStoreBackend: "CouchDB"

# Nginx configurations
nginx:
  imageName: "nginx"
  imageTag: "1.21.1"
  imagePullPolicy: "IfNotPresent"
  replicaCount: 1
  restartPolicy: "Always"
  httpPort: 80
  httpsPort: 443
  httpsNodePort: 31001
  workerProcesses: "auto"
  certificate:
    external: false
    cert_file: ""
    key_file: ""
    sslPassword: ""

# Controller configurations
controller:
  imageName: "openwhisk/controller"
  imageTag: "ef725a6"
  imagePullPolicy: "IfNotPresent"
  replicaCount: 2
  restartPolicy: "Always"
  port: 8080
  options: ""
  jvmHeapMB: "2048"
  jvmOptions: ""
  loglevel: "INFO"

# Scheduler configurations
scheduler:
  enabled: false
  imageName: "openwhisk/scheduler"
  imageTag: "ef725a6"
  imagePullPolicy: "IfNotPresent"
  replicaCount: 1
  restartPolicy: "Always"
  endpoints:
    akkaPort: 25520
    port: 8080
    rpcPort: 13001
  options: ""
  jvmHeapMB: "1024"
  jvmOptions: ""
  loglevel: "INFO"
  protocol: "http"
  maxPeek: 128
  # Sometimes the kubernetes client takes a long time for pod creation
  inProgressJobRetention: "20 seconds"
  blackboxMultiple: 15
  dataManagementService:
    retryInterval: "1 second"
  queueManager:
    maxSchedulingTime: "20 seconds"
    maxRetriesToGetQueue: "13"
  queue:
    idleGrace: "20 seconds"
    stopGrace: "20 seconds"
    flushGrace: "60 seconds"
    gracefulShutdownTimeout: "5 seconds"
    maxRetentionSize: 10000
    maxRetentionMs: 60000
    maxBlackboxRetentionMs: 300000
    throttlingFraction: 0.9
    durationBufferSize: 10
  scheduling:
    staleThreshold: "100ms"
    checkInterval: "100ms"
    dropInterval: "10 minutes"

# etcd (used by scheduler and controller if scheduler is enabled)
etcd:
  # NOTE: external etcd is not supported yet
  external: false
  clusterName: ""
  imageName: "quay.io/coreos/etcd"
  imageTag: "v3.4.0"
  imagePullPolicy: "IfNotPresent"
  # NOTE: setting replicaCount > 1 will not work; need to add etcd cluster configuration
  replicaCount: 1
  restartPolicy: "Always"
  port: 2379
  leaseTimeout: 1
  poolThreads: 10
  persistence:
    size: 2Gi

# Invoker configurations
invoker:
  imageName: "openwhisk/invoker"
  imageTag: "ef725a6"
  imagePullPolicy: "IfNotPresent"
  restartPolicy: "Always"
  runtimeDeleteTimeout: "30 seconds"
  port: 8080
  options: ""
  jvmHeapMB: "2048"
  jvmOptions: ""
  loglevel: "INFO"
  containerFactory:
    useRunc: false
    impl: "kubernetes"
    enableConcurrency: false
    networkConfig:
      name: "bridge"
      dns:
        inheritInvokerConfig: true
        overrides:          # NOTE: if inheritInvokerConfig is true, all overrides are ignored
          # Nameservers, search, and options are space-separated lists
          # eg nameservers: "1.2.3.4 1.2.3.5 1.2.3.6" is a list of 3 nameservers
          nameservers: ""
          search: ""
          options: ""
    kubernetes:
      isolateUserActions: true
      replicaCount: 1

# API Gateway configurations
apigw:
  imageName: "openwhisk/apigateway"
  imageTag: "1.0.0"
  imagePullPolicy: "IfNotPresent"
  # NOTE: setting replicaCount > 1 is not tested and may not work
  replicaCount: 1
  restartPolicy: "Always"
  apiPort: 9000
  mgmtPort: 8080

# Redis (used by apigateway)
redis:
  external: false
  imageName: "redis"
  imageTag: "4.0"
  imagePullPolicy: "IfNotPresent"
  # NOTE: setting replicaCount > 1 will not work; need to add redis cluster configuration
  replicaCount: 1
  restartPolicy: "Always"
  host: null
  port: 6379
  persistence:
    size: 2Gi

# User-events configuration
user_events:
  imageName: "openwhisk/user-events"
  imageTag: "ef725a6"
  imagePullPolicy: "IfNotPresent"
  replicaCount: 1
  restartPolicy: "Always"
  port: 9095

# Prometheus configuration
prometheus:
  imageName: "prom/prometheus"
  imageTag: v2.14.0
  imagePullPolicy: "IfNotPresent"
  replicaCount: 1
  restartPolicy: "Always"
  port: 9090
  persistence:
    size: 1Gi
  persistentVolume:
    mountPath: /prometheus/

# Grafana configuration
grafana:
  imageName: "grafana/grafana"
  imageTag: "6.3.0"
  imagePullPolicy: "IfNotPresent"
  replicaCount: 1
  restartPolicy: "Always"
  port: 3000
  adminPassword: "admin"
  dashboards:
  - https://raw.githubusercontent.com/apache/openwhisk/master/core/monitoring/user-events/compose/grafana/dashboards/openwhisk_events.json
  - https://raw.githubusercontent.com/apache/openwhisk/master/core/monitoring/user-events/compose/grafana/dashboards/global-metrics.json
  - https://raw.githubusercontent.com/apache/openwhisk/master/core/monitoring/user-events/compose/grafana/dashboards/top-namespaces.json

# Metrics
metrics:
  # set true to enable prometheus exporter
  prometheusEnabled: false
  # passing prometheus-enabled by a config file, required by openwhisk
  whiskconfigFile: "whiskconfig.conf"
  # set true to enable Kamon
  kamonEnabled: false
  # set true to enable Kamon tags
  kamonTags: false
  # set true to enable user metrics
  userMetricsEnabled: false

# Configuration of OpenWhisk event providers
providers:
  # CouchDB instance used by all enabled providers to store event/configuration data.
  db:
    external: false
    # Define the rest of these values if you are using external couchdb instance
    host: "10.10.10.10"
    port: 5984
    protocol: "http"
    username: "admin"
    password: "secret"
  # Alarm provider configurations
  alarm:
    enabled: true
    imageName: "openwhisk/alarmprovider"
    imageTag: "2.3.0"
    imagePullPolicy: "IfNotPresent"
    # NOTE: replicaCount > 1 doesn't work because of the PVC
    replicaCount: 1
    restartPolicy: "Always"
    apiPort: 8080
    dbPrefix: "alm"
    persistence:
      size: 1Gi
  # Kafka provider configurations
  kafka:
    enabled: true
    imageName: "openwhisk/kafkaprovider"
    imageTag: "2.1.0"
    imagePullPolicy: "IfNotPresent"
    # NOTE: setting replicaCount > 1 has not been tested and may not work
    replicaCount: 1
    restartPolicy: "Always"
    apiPort: 8080
    dbPrefix: "kp"

busybox:
  imageName: "busybox"
  imageTag: "latest"


# Used to define pod affinity and anti-affinity for the Kubernetes scheduler.
# If affinity.enabled is true, then all of the deployments for the OpenWhisk
# microservices will use node and pod affinity directives to inform the
# scheduler how to best distribute the pods on the available nodes in the cluster.
affinity:
  enabled: true
  coreNodeLabel: core
  edgeNodeLabel: edge
  invokerNodeLabel: invoker
  providerNodeLabel: provider

# Used to define toleration for the Kubernetes scheduler.
# If tolerations.enabled is true, then all of the deployments for the OpenWhisk
# microservices will add tolerations for key openwhisk-role with specified value and effect NoSchedule.
toleration:
  enabled: true
  coreValue: core
  edgeValue: edge
  invokerValue: invoker

# Used to define the probes timing settings so that you can more precisely control the
# liveness and readiness checks.
# initialDelaySeconds - Initial wait time to start probes after container has started
# periodSeconds - Frequency to perform the probe, defaults to 10, minimum value is 1
# timeoutSeconds - Probe will timeouts after defined seconds, defaults to 1 second,
#                  minimum value is 1
# for more information please refer - https://kubernetes.io/docs/tasks/configure-pod-container/configure-liveness-readiness-probes/#configure-probes
# Note - for now added probes settings for zookeeper, kafka, and controller only.
#        in future all components probes timing settings should be configured here.

probes:
  zookeeper:
    livenessProbe:
      initialDelaySeconds: 5
      periodSeconds: 10
      timeoutSeconds: 1
    readinessProbe:
      initialDelaySeconds: 5
      periodSeconds: 10
      timeoutSeconds: 1
  kafka:
    livenessProbe:
      initialDelaySeconds: 5
      periodSeconds: 10
      timeoutSeconds: 1
    readinessProbe:
      initialDelaySeconds: 5
      periodSeconds: 10
      timeoutSeconds: 5
  controller:
    livenessProbe:
      initialDelaySeconds: 10
      periodSeconds: 10
      timeoutSeconds: 1
    readinessProbe:
      initialDelaySeconds: 10
      periodSeconds: 10
      timeoutSeconds: 1
  scheduler:
    livenessProbe:
      initialDelaySeconds: 10
      periodSeconds: 10
      timeoutSeconds: 1
    readinessProbe:
      initialDelaySeconds: 10
      periodSeconds: 10
      timeoutSeconds: 1

# Pod Disruption Budget allows Pods to survive Voluntary and Involuntary Disruptions.
# for more information refer - https://kubernetes.io/docs/concepts/workloads/pods/disruptions/
# Pod Disruptions budgets currently supported for the pods which are managed
# by one of Kubernetes built-in controllers (Deployment, ReplicationController,
# ReplicaSet, StatefulSet).
# Caveats -
# - You can specify numbers of maxUnavailable Pods for now as integer. % values are not
# supported.
# - minAvailable is not supported
# - PDB only applicable when replicaCount is greater than 1.
# - Only zookeeper, kafka, invoker and controller pods are supported for PDB for now.
# - Invoker PDB only applicable if containerFactory implementation is of type "kubernetes"

pdb:
  enable: false
  zookeeper:
    maxUnavailable: 1
  kafka:
    maxUnavailable: 1
  controller:
    maxUnavailable: 1
  invoker:
    maxUnavailable: 1
  elasticsearch:
    maxUnavailable: 1

# ElasticSearch configuration
elasticsearch:
  external: false
  clusterName: "elasticsearch"
  nodeGroup: "master"
  # The service that non master groups will try to connect to when joining the cluster
  # This should be set to clusterName + "-" + nodeGroup for your master group
  masterServiceValue: ""
  # Elasticsearch roles that will be applied to this nodeGroup
  # These will be set as environment variables. E.g. node.master=true
  roles:
    master: "true"
    ingest: "true"
    data: "true"
  replicaCount: 1
  minimumMasterNodes: 1
  esMajorVersionValue: ""
  # Allows you to add any config files in /usr/share/elasticsearch/config/
  # such as elasticsearch.yml and log4j2.properties, e.g.
  #  elasticsearch.yml: |
  #    key:
  #      nestedkey: value
  #  log4j2.properties: |
  #    key = value
  esConfig: {}
  # Extra environment variables to append to this nodeGroup
  # This will be appended to the current 'env:' key. You can use any of the kubernetes env
  # syntax here
  #  - name: MY_ENVIRONMENT_VAR
  #    value: the_value_goes_here
  extraEnvs: []
  # Allows you to load environment variables from kubernetes secret or config map
  # - secretRef:
  #     name: env-secret
  # - configMapRef:
  #     name: config-map
  envFrom: []
  # A list of secrets and their paths to mount inside the pod
  # This is useful for mounting certificates for security and for mounting
  # the X-Pack license
  #  - name: elastic-certificates
  #    secretName: elastic-certificates
  #    path: /usr/share/elasticsearch/config/certs
  #    defaultMode: 0755
  secretMounts: []
  image: "docker.elastic.co/elasticsearch/elasticsearch"
  imageTag: "6.7.2"
  imagePullPolicy: "IfNotPresent"
  podAnnotations: {}
  labels: {}
  esJavaOpts: "-Xmx1g -Xms1g"
  resources:
    requests:
      cpu: "1000m"
      memory: "2Gi"
    limits:
      cpu: "1000m"
      memory: "2Gi"
  initResources: {}
  sidecarResources: {}
  networkHost: "0.0.0.0"
  volumeClaimTemplate:
    accessModes: [ "ReadWriteOnce" ]
    resources:
      requests:
        storage: 30Gi
  rbac:
    create: false
    serviceAccountName: ""
  podSecurityPolicy:
    create: false
    name: ""
    spec:
      privileged: true
      fsGroup:
        rule: RunAsAny
      runAsUser:
        rule: RunAsAny
      seLinux:
        rule: RunAsAny
      supplementalGroups:
        rule: RunAsAny
      volumes:
        - secret
        - configMap
        - persistentVolumeClaim
  persistence:
    annotations: {}
  extraVolumes: []
  # - name: extras
  #   mountPath: /usr/share/extras
  #   readOnly: true
  extraVolumeMounts: []
  # - name: do-something
  #   image: busybox
  #   command: ['do', 'something']
  extraContainers: []
  # - name: do-something
  #   image: busybox
  #   command: ['do', 'something']
  extraInitContainers: []
  # The default is to deploy all pods serially. By setting this to parallel all pods are started at
  # the same time when bootstrapping the cluster
  podManagementPolicy: "Parallel"
  # The environment variables injected by service links are not used, but can lead to slow Elasticsearch boot times when
  # there are many services in the current namespace.
  # If you experience slow pod startups you probably want to set this to `false`.
  enableServiceLinks: true
  protocol: http
  connect_string: null
  host: null
  httpPort: 9200
  transportPort: 9300
  service:
    labels: {}
    labelsHeadless: {}
    type: ClusterIP
    nodePort: ""
    annotations: {}
    httpPortName: http
    transportPortName: transport
    loadBalancerIP: ""
    loadBalancerSourceRanges: []
  updateStrategy: RollingUpdate
  podSecurityContext:
    fsGroup: 1000
    runAsUser: 1000
  securityContext:
    capabilities:
      drop:
      - ALL
    # readOnlyRootFilesystem: true
    runAsNonRoot: true
    runAsUser: 1000
  # How long to wait for elasticsearch to stop gracefully
  terminationGracePeriod: 120
  sysctlVmMaxMapCount: 262144
  readinessProbe:
    failureThreshold: 3
    initialDelaySeconds: 10
    periodSeconds: 10
    successThreshold: 3
    timeoutSeconds: 5
  # https://www.elastic.co/guide/en/elasticsearch/reference/7.8/cluster-health.html#request-params wait_for_status
  clusterHealthCheckParams: "wait_for_status=green&timeout=1s"
  ## Use an alternate scheduler.
  ## ref: https://kubernetes.io/docs/tasks/administer-cluster/configure-multiple-schedulers/
  ##
  schedulerName: ""
  imagePullSecrets: []
  nodeSelector: {}
  tolerations: []
  nameOverride: ""
  fullnameOverride: ""
  # https://github.com/elastic/helm-charts/issues/63
  masterTerminationFix: false
  lifecycle: {}
    # preStop:
    #   exec:
    #     command: ["/bin/sh", "-c", "echo Hello from the postStart handler > /usr/share/message"]
    # postStart:
    #   exec:
    #     command:
    #       - bash
    #       - -c
    #       - |
    #         #!/bin/bash
    #         # Add a template to adjust number of shards/replicas
    #         TEMPLATE_NAME=my_template
    #         INDEX_PATTERN="logstash-*"
    #         SHARD_COUNT=8
    #         REPLICA_COUNT=1
    #         ES_URL=http://localhost:9200
    #         while [[ "$(curl -s -o /dev/null -w '%{http_code}\n' $ES_URL)" != "200" ]]; do sleep 1; done
    #         curl -XPUT "$ES_URL/_template/$TEMPLATE_NAME" -H 'Content-Type: application/json' -d'{"index_patterns":['\""$INDEX_PATTERN"\"'],"settings":{"number_of_shards":'$SHARD_COUNT',"number_of_replicas":'$REPLICA_COUNT'}}'
  sysctlInitContainer:
    enabled: true
  keystore: []
  # Deprecated
  # please use the above podSecurityContext.fsGroup instead
  fsGroup: ""
  indexPattern: "openwhisk-%s"
  username: "admin"
  password: "admin"

akka:
  actorSystemTerminateTimeout: "30 s"
这里主要也要修改values.schema.json文件,配置正确的values.yaml校验选项。
"actionsInvokesPerminute": { "type": "string", "description": "The maximum number of action invocations per minute by a single namespace" },
"actionsInvokesConcurrent": { "type": "string", "description":  "The maximum number of concurrent action invocations by a single namespace" },
"triggersFiresPerminute": { "type": "string", "description": "The maximum triggers fired per minute for a single namespace" },
"actionsSequenceMaxLength": { "type": "string", "description": "The maximum length of an action sequence" },
(4)配置runtimes.json
runtimes.json对OpenWhisk系统所使用的所有运行时环境进行了定义,而我们修改runtimes.json的目录只是为了配置对应运行时的容器预热策略,以确定OpenWhisk对应runtime的预热容器个数,进而确定容器副本个数,也就是单个函数(Action)对应的沙箱个数。
预热策略在(https://github.com/apache/openwhisk/blob/master/docs/actions.md#how-prewarm-containers-are-provisioned-without-a-reactive-configuration)有详细配置说明。
我们配置helm/openwhisk/runtimes.json如下:
        "python": [
            {
                "kind": "python:3",
                "default": true,
                "image": {
                    "prefix": "openwhisk",
                    "name": "action-python-v3.7",
                    "tag": "1.17.0"
                },
                "deprecated": false,
                "attached": {
                    "attachmentName": "codefile",
                    "attachmentType": "text/plain"
                },
                "stemCells": [
                    {
                        "initialCount": 50,
                        "memory": "256 MB"
                    }
                ]
            }
        ],
这表示配置python运行环境下的python:3运行时的容器预热策略为静态配置50个容器。
(5)执行OpenWhisk部署
执行以下命令,使用Helm安装OpenWhisk到K8s:
helm install owdev ./helm/openwhisk -n openwhisk --create-namespace -f mycluster.yaml
注意需要配置OpenWhisk能够掌控的Action部署节点:
# 命令格式
kubectl label node <INVOKER_NODE_NAME> openwhisk-role=invoker
# 执行
kubectl label node work1 openwhisk-role=invoker
kubectl label node work2 openwhisk-role=invoker
如果部分Pod(如controller-0)出错,检查statefulset是否自动配置正确:
kubectl edit statefulset owdev-controller -n openwhisk
检查OpenWhisk部署状态:
kubectl get pods -n openwhisk
OpenWhisk成功启动效果图(部分install package pod error不需要在意):

(6)配置wsk CLI访问令牌
使用如下command配置wsk CLI访问令牌,--apihost替换为自己集群的apihost以及对应port,auth配置为官方在Helm Chart中预定义的验证码(可以自行修改Helm Chart):
wsk -i property set --apihost 192.168.1.21:31001 --auth 23bc46b1-71f6-4ed5-8c54-816aa4f8c502:123zO3xZCLrMN6v2BKK1dXYFpXlPkccOFqm12CdAsMgRU4VrNZ9lyGVCGuMDGIwP
完成以上设置后,呈现以下结果:

三、OpenWhisk函数实践
无感计算函数在OpenWhisk被定义为Action,可以通过wsk CLI命令行进行同步/异步调用,或者通过配置Web函数来实现对Action的HTTP/HTTPS访问。同时,wsk CLI也定义一套API触发器机制,可以对每个Web函数配置REST API。本小节使用Python:3运行时环境部署Web函数作为实践示例。下图展示了OpenWhisk函数调用的流程。

【1】使用wsk CLI创建函数
编写函数代码pyfunc.py如下:
import requests
import json

def main(params):
    url = 'http://192.168.1.76:14321'
    headers = {'Content-Type': 'application/json'}
    data = json.dumps(params)
    response = requests.post(url, data=data, headers=headers)
    return response.json()
需要注意的是,在OpenWhisk中,除了函数嵌套调用链之外,其他的任何函数都需要使用JSON格式作为输入输出,controller组件会自动将输入参数解析为JSON格式,并检查返回值是否为JSON格式。故在Python:3运行时中我们可以导入运行时自带的支持库requests、json而不需要外部依赖,通过一些JSON格式的数据转换传递参数并实现参数的解析。
使用wsk CLI创建函数:
wsk -i action create pyfunc pyfunc.py


我们可以直接使用wsk CLI发起一些函数调用:
# 异步调用函数,不会打印函数的执行结果(保存在CouchDB的activation database中)
wsk -i action invoke pyfunc -P some.json
# 使用--result参数同步调用函数,执行结果会通过网关返回到客户端
wsk -i action invoke pyfunc -P some.json --result

可以在activation数据库中查看函数调用情况数据:
# 由于CouchDB的离线特性,可能需要两次执行才会打印正确的结果
wsk -i activation list

打印的结果中有发起函数调用的时间,函数调用记录activation ID,运行时环境Kind,是否为冷启动,函数执行时间、执行状态,函数命名空间和版本。
可以根据activation ID查看异步函数调用结果:
wsk -i activation result 027b45ef2d2e4c6ebb45ef2d2e6c6e14

【2】使用wsk CLI创建具有外部依赖库的函数
要创建具有外部依赖库的OpenWhisk函数,我们需要将程序文件与外部依赖项封装为压缩包,通过压缩包来部署函数。不同语言的runtime配置外部依赖的方式不同,具体可以阅读(https://github.com/apache/openwhisk/tree/master/docs)中对各种语言运行编写的md文件。本文使用Python:3运行时来举例说明。

由于官方给出的md文件中对于Python运行时的外部依赖配置存在较大问题,经过调研与验证,具体可以参考这个issue(),这里就事论事的说如何配置外部环境依赖。
Python:3 virtualenv load failed?
Updated May 2, 2023
首先,编写requirements.txt,包含所有外部依赖项:
redis-py-cluster
安装virtualenv管理器,并使用virtualenv安装依赖项:
apt install -y python3-virtualenv
virtualenv virtualenv
source virtualenv/bin/activate
pip install -r requirements.txt
deactivate
编写__main__.py,注意这里必须是这个文件名,并且必须有main方法,方法的入参是一个JSON数据,返回值也必须定义为JSON数据:
from rediscluster import RedisCluster
import time
def main(args):
    key = str(args.get("key"))
    nodes = [
        {'host': '192.168.1.31', 'port': '6001'},
        {'host': '192.168.1.32', 'port': '6001'},
        {'host': '192.168.1.33', 'port': '6001'},
    ]
    start = time.time()
    src = RedisCluster(startup_nodes=nodes, decode_responses=True)
    res = src.get(key)
    t = float(time.time() - start) * 1000

    return {"result": res, "t": t}
创建压缩文件,将__main__.py和刚才安装了外部依赖项的虚拟环境打包在一起:
zip -r read-py.zip virtualenv __main__.py
创建函数,并配置Web函数及其对应REST API:
wsk action create read-py --kind python:3 read-py.zip --web true -i
wsk api create /readpy post read-py -i

可以根据打印的地址访问函数,但由于HTTPS的SSL验证问题,我们先查看K8s暴露的NodePort端口:
kubectl get svc -n openwhisk

OpenWhisk的nginx网关使用31001作为HTTPS端口,使用30592作为HTTP端口,故在HTTPS暴露的URL也可以通过HTTP协议从30592访问。
使用curl命令发送POST请求访问Action,并可以在activation数据库中查看函数调用情况。
curl -H "Content-Type: application/json" -X POST -d '{"key":"xuz006"}' http://192.168.1.21:30592/api/23bc46b1-71f6-4ed5-8c54-816aa4f8c502/readpy

或者我们可以直接使用wsk cli访问Action:
# --param参数用于定义输入函数的JSON数据,可以使用-p替换,如果缺少--result,则为不在网关返回结果的异步调用方式
wsk -i action invoke read-py --param key xuz006 --result

【3】使用wsk CLI配置Web函数的REST API
在上文中我们已经接触到了Web Action,并使用Web Action以REST API的方式读取Redis集群的数据。Web Action的详细文档位于(https://github.com/apache/openwhisk/blob/master/docs/webactions.md)。由于HTTP/HTTPS请求需要等待网关返回数据,所以Web Action必然是同步的()。
How set openwhisk web action asynchronous ?
Updated May 2, 2023
在创建函数时,我们通过
--web参数标识Web Action:# --web true表示创建的函数是Web函数 wsk action create read-py --kind python:3 read-py.zip --web true -i # --web raw表示不仅创建的函数是Web函数,还使用原生HTTP解析 wsk action create read-py --kind python:3 read-py.zip --web raw -i # --web false表示关闭函数的Web访问 wsk action update read-py --kind python:3 read-py.zip --web false -i

可以看到Web标识为true和raw的两种Action的返回值存在差异。
如我们前文所描述的,多个Trigger可以通过Rule绑定多个Action,这里API与函数也是多对一的关系。例如:
# 创建/readpy API并通过POST请求绑定read-py函数
wsk api create /readpy post read-py -i
# 创建/readpy API并通过GET请求绑定read-py函数
wsk api create /readpy get read-py -i
只要定义的规则Rule(POST、GET、DELETE)不同,wsk CLI就可以成功执行,并对Web触发器和函数同时产生作用,建立两者之间联系的规则。需要注意的是,不能同时设置POST、GET等多个Rule,只能通过多个不同的Rule实现一个API到函数的多种形式的映射。
同样的,不同的API也可以绑定到同一个函数:
wsk api create /readpy111 post read-py -i

【4】使用wsk CLI异步调用函数
异步函数的多线程测试需要消耗大量CPU资源,故我们在测试节点上部署wsk CLI,配置相应的网关令牌,远程控制OpenWhisk集群。
test.sh(使用100个线程同时传输JSON数据调用异步函数)
while true ; do
  for (( i=1; i<=100; i++ ))
    do
      wsk -i action invoke -P request.json write-py &
  done
done
只要不带result参数且不是Web函数,函数就是异步调用的模式。
对于统计每秒完成了多少个异步函数调用的程序,目前正在开发过程中,也欢迎师弟师妹给出意见,相关issue见()。
How to count async Action invoke per second? Or count the total amount of asynchronous Action invoke?
Updated May 9, 2023
四、结束语
OpenWhisk是一款历史悠久的重量级开源无感计算框架,其具备着完善的无感计算生态,但又存在着很多学术界和工业界很少触及的工程问题,甚至于说这个框架设计之初就缺乏对未来的学术界、工业界如何考察、分析和优化无感计算框架性能的远见。但由于它仍然是一筐优秀的开源无感计算框架,我们仍然要积极解决工程问题,探索对无感计算框架的优化设计方案。在未来,我们也许要对OpenWhisk的源码进行分析,或者说更改它的源代码来实现我们想看到的idea。
谢谢!
感谢五一在实验室奋斗的自己QWQ
- 作者:GOODLab
- 链接:https://good.ncu.edu.cn/LabBlogs//LabBlogs/4954da47-b524-46fa-8f02-838649dc6a03
- 声明:本文采用 CC BY-NC-SA 4.0 许可协议,转载请注明出处。
相关文章